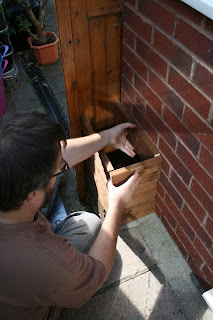
When we want or need a raised border we never buy them, Lucien buys deck boards and builds them instead. This is a guide on how to build them. We started with an area by our back door.
 |
| Before anything happened. |
Lucien got some stained deckboards.
He then measured the area of where he wanted the raised border and marked up each of the sides on the board.
Lucien then got out the power saw (Black & Decker Scorpion) then measured the boards against each other to make sure that they were all equal sizes.
Lucien went and tried it in the area where he wanted it to make sure it looked okay, before continuing.
Afterwards, Lucien pre-drilled holes before putting the deck screws through.
 |
| Pre-drilling the holes. |
Lucien's trick is to put all the screws in part way, before putting all the way through.
Both outer sides are done the same way. This is what they should look like.
Luciens next task was to get a bit of wood for the wall side and pre-drill holes through and mark the wall. Then with a power drill, drill holes and place wall plugs into the wall.
 |
| Lucien attached the back part to the part that fits against the fence. |
After the back of the border was attached to the wall, Lucien then got the two outer parts and fitted them together before attaching them to the back.
 |
| Attaching outer parts together. |
This is how the border looks so far.
Lucien used an old compost bag to line the border to stop damp and rot of the wood. He put a couple of slits in the bottom for drainage and nailed the top of the bag to keep it in place.
The last thing that Lucien did was to fill it with compost, select the plants he wanted and plant them out.
 |
| Selecting plants. |


I never knew you had a blog Laura, super thank you for sharing this, just what we needed!
ReplyDeleteIts a secret blog until I build it up a bit :)
ReplyDelete